
When I started the Specific Carbohydrate Diet (SCD) in 2001, I knew that I would need to learn how to make yogurt from scratch. I had become friends with Elaine Gottschall, and she emphasized in our chats and her book that this was an important part of the SCD which aims to rebuild the health of the gut.
Back then I made yogurt everyday for the boys. I had 2 toddlers at home and they gobbled it up as fast as I could make it! Now, I make yogurt around once a week, and they still love it. Below I will show you how to make yogurt the SCD way.
What is Yogurt?
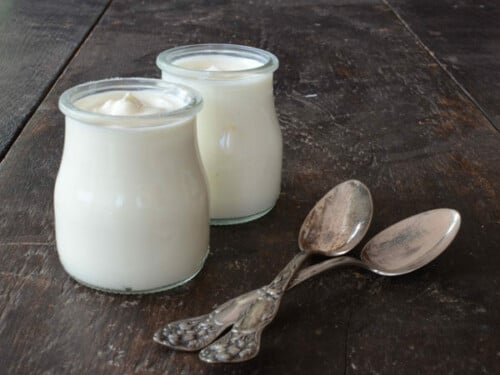
Yogurt is a semi-solid sour food that is made from milk fermented by bacteria. It is often sweetened and flavored, which is another great reason to make yogurt at home, so that you can avoid the added sugar. Yogurt is one of the oldest agrarian foods known to humankind. It was a way in which to store the dairy products produced by cows, goats, sheep, and other mammals prior to the advent of refrigeration.
Lactose-Free Yogurt
When milk is left in a warm environment, a variety of bacteria and yeast start to grow and digest the milk sugars, or lactose as a source of fuel. If fermented long enough, yogurt will be almost completely lactose-free. That is why lactose intolerant people such as myself that cannot drink a glass of milk without getting very sick, can easily digest homemade yogurt that has been fermented for 24 hours. The bacteria in yogurt digest the lactose, as well as the casein, or milk protein.
Other Fermented Milk Products
There are various ways to ferment milk and make products similar to yogurt such as kefir. The fermented milk product that is created is dependent on the type of bacteria that is cultured. Yogurt is made from bacteria that produces a wonderful tart and tangy flavor.
Yogurt Starters
Yogurt can be made by using starter or a few teaspoons of some leftover yogurt to introduce bacteria to milk in order to ferment it into yogurt. I make yogurt using a starter that I buy at the store. It’s not as “DIY,” but I have found over the decades that I’ve made yogurt that using a starter is the most reliable method for me.
Yogurt Incubators
There are many ways to culture your yogurt and apply the heat that is necessary for fermentation. You can use an oven if the temperature is low enough, or if it is not, you can use an oven with the light on to provide heat. I have not had success with this method as I found it challenging to control that environment and keep the heat even. I’ve also heard of people that use a crockpot, heating pad, or dehydrator to culture their yogurt. I haven’t tried that so not sure how consistent your results will be.
I use a yogurt maker to make homemade yogurt. I have had the same yogurt maker since I began making yogurt in 2001. I have slightly “Elana-fied” the process. Instead of placing the milk directly in the yogurt maker which is plastic, I place my yogurt mixture in a mason jar and then let that mason jar incubate in the yogurt maker. There are yogurt makers that come with glass containers instead of plastic. However, I do not want to buy another gadget so I have created my own fix so that our food does not come into contact with this substance. Another great thing about using mason jars is that you won’t need to transfer the yogurt to a container for storage after it has fermented because it’s already in one.
Choosing a Base
I make this yogurt recipe using dairy as a base. I have tried it with coconut milk and the results were not good. While the coconut milk fermented and tasted nice and sour, the texture was an abomination. I will be working on a homemade coconut milk yogurt recipe and posting it in the future so stay tuned!
I make yogurt with whole milk or half and half. Since I am following a very low-carb diet (VLCD), also known as the Keto Diet, dairy-products with a higher percentage of fat are best for me. This may not be the case for you since different foods work for different body types. I haven’t tried low-fat or non-fat milk in this yogurt recipe, so I’m not certain that it would work, but I believe there is a very good chance that it would.
Using higher fat dairy products reduces the amount of milk sugars, or lactose, and milk protein, or casein in the finished product. The fermentation process of making yogurt further reduces the amount of these substances by digesting them during incubation.
I use dairy products that are organic, and whenever possible, grass-fed. Because many dairy products are contaminated with added hormones and antibiotics, and because I view food as my medicine, this is critical for me. Everyone is different, so this may not be as important for you. Raw milk is fantastic if you have access to it, and I made this recipe using raw milk when the boys were at a Waldorf school and we had a cow share with the other families. If you don’t have access to raw milk and you are using store bought, do not buy ultra-pasteurized dairy products for your base as this process wipes out much of the good bacteria in the dairy product.
Quick Method for Heating the Base
Every yogurt recipe I’ve seen instructs you to heat your milk to 180°F. I have found that this is not necessary unless using raw milk. I heat the yogurt base in this recipe to between 108°-112°F and the recipe works every time. If you are using raw milk, heat it to 180°F.
Fermentation
When using the yogurt starter and yogurt maker that I recommend in this recipe, it is possible to ferment the yogurt for as little as 5 hours. Remember though, the longer you ferment the yogurt the more of the lactose and casein are digested as fuel for the bacteria to thrive upon. Additionally, the longer you ferment the yogurt the thicker its texture will be, and it will also have a more tart flavor. I have fermented yogurt for as long as 48 hours and it was amazing. When I did this with half and half, it tasted like sour cream!
How to Make Yogurt
Instructions
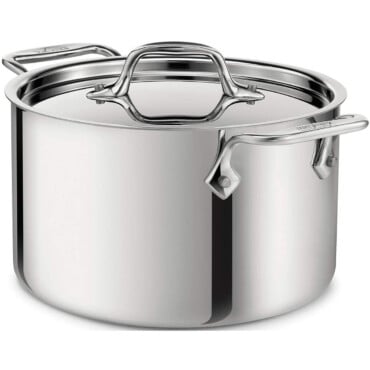
- In a medium pot, heat milk to 108°-112°F
- Place yogurt starter in mason jar
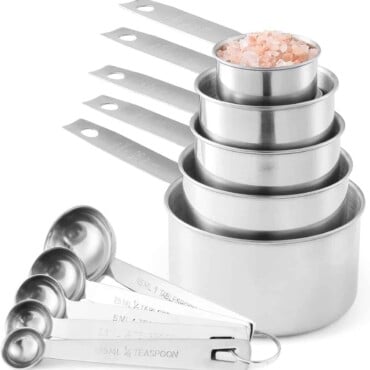
- Place ½ cup of heated milk into starter, stirring until smooth
- Pour remainder of milk into mason jar, stirring well
- Transfer mason jar into yogourmet yogurt maker
- Leave mason jar uncovered
- Cover yogurt maker
- Ferment for 24 hours for SCD compliant yogurt
- Serve
Equipment
Storing Homemade Yogurt
After my yogurt has fermented for 24 hours I remove it from the yogurt maker and place it on the counter to cool to room temperature. That usually takes an hour or so. After that I put a lid on the mason jar and place the yogurt in the refrigerator. I pour off any of the liquid that forms on it as this is whey and I avoid dairy proteins. You may not avoid them, so you may wish to save it for another use. The yogurt will keep for around a week, though my boys can still eat a batch in one day!
When I eat yogurt I do not add anything to it. The boys eat it plain or add a little bit of local honey that our neighbor gives us from his beehives.
I’m not quite sure why it took me so long to share my method for making yogurt, since I’ve been making my own since 2001. I hope this helps you all get started with your own yogurt making adventures and that you love it as much as we do!


Leah says
My mother always made yogurt in the oven in a water bath in jars–could do small mason jars. We ate it with a sm spoonful of frozen orange juice concentrate stirred into it–it was so good!
I would love to get a good coconut milk recipe to try.
Elana says
Thanks Leah!
Lisa says
Do you always have to start a new batch of yogurt with a packet of starter or can you use some yogurt as your starter?
Elana says
Lisa, I discuss this in the 6th paragraph of this post in the section called “Yogurt Starters” :-)
Diane says
I will be anxious to see your coconut milk yogurt recipe. We are regular users of coconut oil, coconut milk in various forms, even delicious coconut ice cream. No cow’s milk, whatsoever!
Elana says
Thanks Diane!
Debbie F. says
Elana what brand of milk do you use? I also make SCD yogurt ( have been struggling with SIBO for last year) for at least 24 hr’s and then I strain it for 4-5 hours. It becomes this luscious, tart, thick and creamy greek yogurt that I absolutely love. I have been using organic whole milk but it is ultra pasteurized. The taste is great but is not giving me the good bacteria? I have seen raw milk @ my Sprouts but was afraid to use it. Is their a name brand that is organic and not ultra pasteurized?
Thanks….love your site
Elana says
Debbie, you are still getting good bugs from the yogurt starter, just not from the base (i.e, the half and half or whole milk) if it’s ultra pasteurized. We like the Straus Family Creamery brand :-)
Debbie F. says
Thanks for your reply Elana…I have seen that brand @ Sprouts and I will try it my next batch. I also use the yougourmet starter and have always been very happy with the results. I purchased a Dash Go yogurt maker and it took me a long time to be able to regulate the temp. It was getting way to hot, so I bought a “dimmer” switch and it has helped a bunch. I read that the temp should never get hotter than 112 degree’s. It has been like a science project but totally worth the work.
Again, I thank you for your great site, it has helped me so much!
Elana says
You’re welcome Debbie!
Sarah says
Debbie,
If you can get your hands on Kalona Supernatural brand whole milk, I believe it is grass-fed and organic, and very low-temp pasteurized as well as non-homogenized. It has a really wonderful flavor. That’s the only brand of “store milk” I will drink if my regular raw milk isn’t available.
christl says
I’ve been making Kefir and Yogurt for years. I started with a small store-bought container of the best organic yogurt I could find, and fairly recently used a half-cup container of organic kefir.
– For consequent batches I use a quarter cup container from the last batch.
– In both cases I heated two litres of lactose free milk – while doing other things in the kitchen – until bubbles appear on the surface of the milk.
– Then I put the pot with milk aside and let it cool off til it’s lukewarm. By the way, I love eating the skin that forms in the cooling-off time. Its flavour reminds me of fresh cream from bygone times.
– While that happens I’ve taken out of the fridge the last above mentioned container of kefir or yogurt to allow it to warm up to room temperature.
– I then add that container’s content to the warm milk, stir the mixture up with a whisk,
– re-fill all of my empty containers (some 250ml mason jars, some smaller glass jars, all with lids,
– place them on a metal pizza sheet and leave the lot in the warm oven for about 8 hours, or overnight.
You’ll have the nicest, firm yogurt or kefir. No special equipment or ingredients required. Of course, all equipment has to be so clean!
This recipe was given to me by a young Turkish woman who worked with me a few years ago. I’d proudly told her about a new yogurt maker I’d acquired. She laughed, and suggested I should keep life simple…..
Christl
Elana says
Thanks!
Kaneez says
How does she keep the oven warm? Do you mean by keeping the oven light on?
Mimi says
Is this like Greek Yogurt, or is there anything to do that would make it like Greek Yogurt?
Elana says
Hi Mimi, to make a Greek style yogurt you can strain the yogurt using a yogurt strainer!
Judy Wong says
I make my yogurt with skim milk, I add extra skim milk powder and incubate for 5 hours max as I dislike too tart of a taste. Perfect every time, bring milk up to 180 and cool down in a water bath. Excellent texture with the extra skim milk powder. Higher in protein, and higher calcium, great if you are trying to increase intake for osteoporosis….great if you do not need to be concerned with lactose
Elana says
Thanks Judy!
EB says
I’ve been heating my milk to 180 and cooling it down to 112 for many years. It takes so long – and often a lot of ice – for the cooling process; I’m excited to try heating to 112. FYI: I’ve found half gallon glass jars online that fit the yogourmet machine perfectly. They allow me to make a bigger batch in one go! Thanks for sharing your process.
Elana says
You’re welcome EB!
Jennifer says
I make my own coconut yogurt every week and it is so easy and delicious. The texture is perfect. I don’t use a yogurt maker- just the heat of the oven. I’m wondering if the problem you had w/ texture is because you used a canned coconut milk? I avoid canned products (even BPA free) so I use fresh frozen extra virgin coconut meat and my raw homemade cashew milk as a base. It’s amazing and I’m happy to share the recipe/ technique if you’d like:)
Elana says
Thanks Jennifer!
steven lutz says
hi I would love to her your recipe on yogurt thanks steven
Christa says
Where do you get the coconut meat? I have been looking for it for ages!
Thanks!
Robert says
Jennifer..please email me the recipe for the coconut many thanks.Robert.
Charlotte Rhoads says
I would love to have your recipe for coconut yogurt and also find out where you get your frozen coconut meat.
Charlotte
Cibby says
Jennifer, please share your recipe/technique of coconut and cashew yoghurt. Sounds delish! Would love to try it. Thanks!
b says
I WOULD REALLY LIKE YOUR DIRECTIONS ON MAKING YOUR COCONUT/CASHEW YOGURT. PLEASE EMAIL ME. THANKS
Elaine says
Thank you for posting this. I know I need more fermented food and so will be watching for your coco ut milk yogurt.
Elana says
Thanks Elaine!